
The [Validation comparison] app lets you check a color-validation test result against a reference.
Multiple instances of the Validation comparison app can be open at the same time.
Can also be started from the [Validation results] app, using the selected test as the reference test for the comparison.
You can select a reference print condition to compare yourself to, and it enables you to choose and customize optional parameters of that print condition.
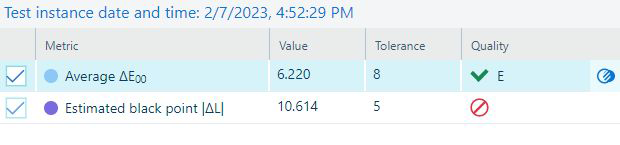
In the [Metrics] view, you can select one of the metrics to open the [Validation comparison] app.
Press the button
![]() located in the last column of the list. The button is only visible when the mouse cursor hovers above the table row. The [Validation comparison] will have the relevant reference values filled in.
located in the last column of the list. The button is only visible when the mouse cursor hovers above the table row. The [Validation comparison] will have the relevant reference values filled in.
The [Validation comparison] app consists of three panels:
[Filters]
Select one [Reference test] and the rest of attributes for comparison.
Select the [Comparison test] and select a value for the attributes.
[Metrics]
[Test instances]
In the [Filters] section, you can filter the information that you want to see in the graphs and reports.
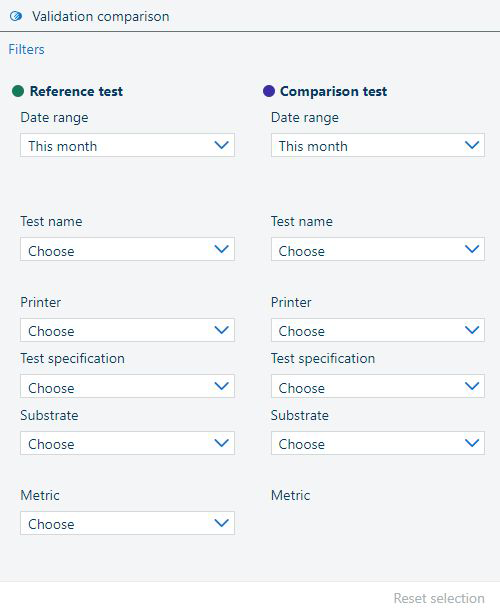
The [Reference test] and [Comparison test] have a separate vertical section with test attributes side-by-side.
When the [Validation comparison] app is opened from the menu, all filter fields are empty.
When the [Validation comparison] app is opened from [Validation results], the values for the [Reference test] come filled with the values, and you only need to pick the values of the [Comparison test] parameters.
The filters are linked together to let you narrow down the results. In the [Comparison test] section, you will only see the filter options which point to a valid result when combined with the [Reference test] filter options
You can select the following:
[Date range]: start by selecting the time interval you want to compare;
[Test name];
[Printer];
[Test specification];
[Substrate];
[Metric];
[Metric] can only be selected once, in the [Reference test] section, for the comparison to make sense.
If you want to clear all the filters, click the [Reset selection] button.
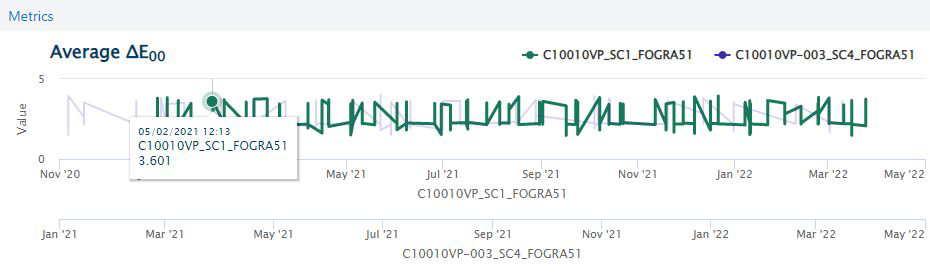
Once you have selected one of the options in the [Metrics] list, the pane will display a chart with the evolution of the desired metric over the selected data range.
Hover the mouse cursor over the graph to see the actual shown value.
Click the dot in the graph to select the test instance.
Click one of the elements of the legend to have the graph hide the other one for clarity.
When the test instance contains failed metrics, the app marks them with a red dot in the graph.
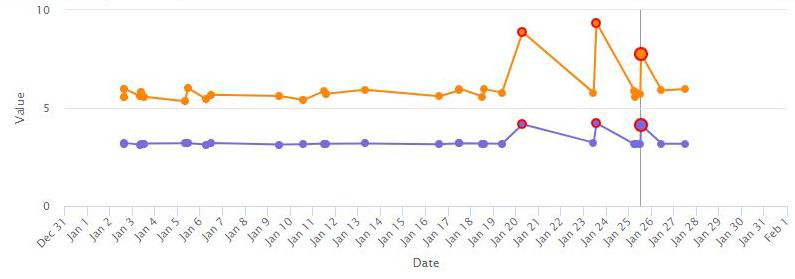
If any of the compared test contains more than one instance, the [Test instances] will display a list with all that match the filter. Select a different instance to shift the comparison focus to that particular instance.
Double-click one of the entries in the list to open the [Test report] in its own workspace.

For more details, see Test report app.
You can open or download the test results as a PDF.
Delete the [Test instances] you no longer need.
 Buttons in the toolbar of the [Test instances] table