
The [Issues] tab lets you manage the current visit.
Parts can now be associated with a specific issue.
When a visit session is not yet started, the workspace is empty, and the button [Start visit] lets you start a new session.
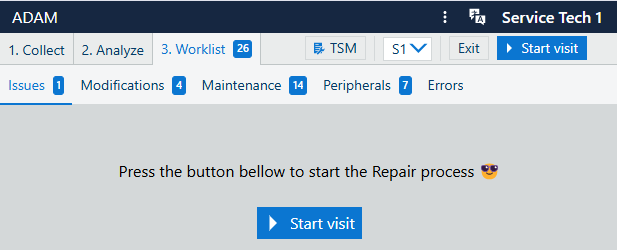 Service visit not yet started
The content of the list of issues can be filtered from the three dots menu.
The fields in this list are, as follows:
1st column has no header.
It contains a check-box for selecting more than one issue, in case you need to
[Action] (can be one of [Done], [Postpone] or )
A few additional actions are hidden behind the "[More] " button:
[No action needed]
[Replaced]
[Adjusted / Calibrated]
[Cleaned / Lubricated]
[Updated / Re-installed software]
[Instructed]
[Area]
[Description]
[Remark]
[Used parts]
To start a new visit, use the [Start visit] button to proceed.
The dialog [Start service visit] will request a few details:
The mandatory fields are marked with an asterisk.
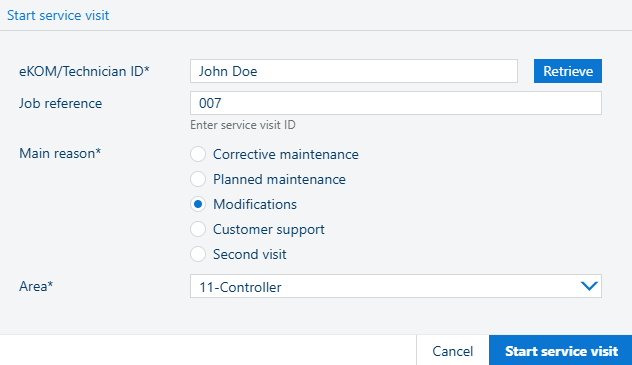 The [Start service visit] dialog
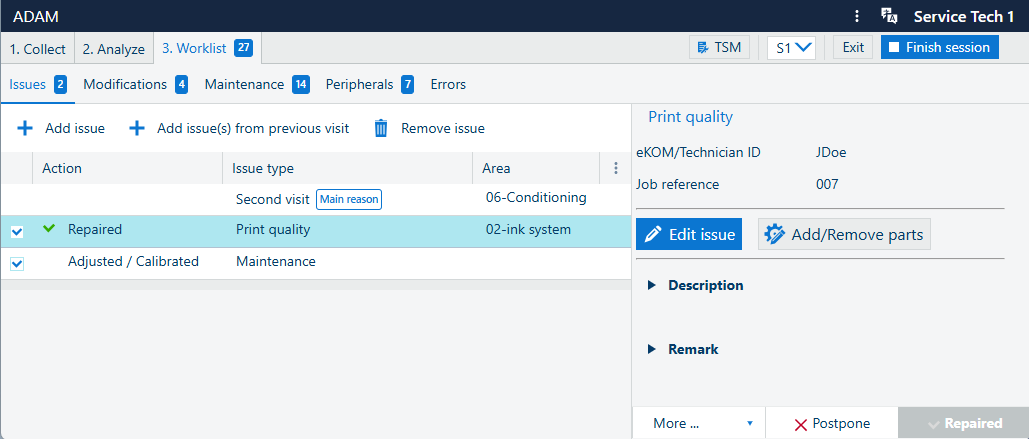
The toolbar offers a quick way of reaching the following functions:
![]() [Add issue]
[Add issue]
Lets you add a new issue for the current visit.
![]() [Add issue(s) from previous visit]
[Add issue(s) from previous visit]
Lets you add a new issue from the last visit.
![]()
Lets you delete the selected issues (check-mark on the first column) from the list.
The left-hand-side panel shows some extra details for the selected issue in the main list. The title is taken from the , followed by read-only information about [eKOM/Technician ID] and the [Job reference].
You can:
![]() or , depending.
or , depending.
Pressing this button will open the or the pop-up dialog.
![]()
![]() or , depending.
or , depending.
Give a short [Description] for the visit.
Add an optional [Remark]
To the bottom of this panel:
behind the [More] button, you can select the action for the issue.
the actions
![]() [Postpone] and
[Postpone] and
![]() [Repaired] can be used to close the issue.
[Repaired] can be used to close the issue.