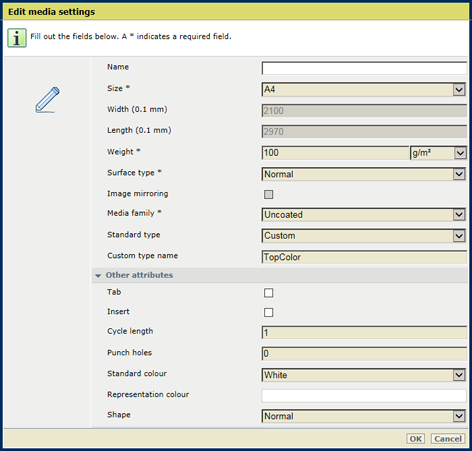

The PRISMAsync Print Server media catalog lists all media that can be selected for jobs. You can change several media attributes.

|
When you want to |
Solution |
|---|---|
|
Go to the media catalog |
|
|
Add media |
|
|
Copy media |
|
|
Edit media |
|
|
Delete media |
|
 Media attributes
|
Media attribute |
Description |
|---|---|
|
[Name] |
Name according to naming conventions. |
|
[Size] |
The size of the media. |
|
[Width] |
The width of the media. |
|
[Length] |
The length of the media. |
|
[Weight] |
The media weight of the media. |
|
[Surface type] |
The surface type of the media. |
|
[Image mirroring] |
Indicates if images must be mirrored. |
|
[Media family] |
The media family. |
|
[Standard type] |
The custom media type. |
|
[Custom type name] |
The custom type name according to naming conventions. |
|
[Tab] |
Indicates if the media are tab paper. |
|
[Insert] |
Indicates if the media are inserts. |
|
[Cycle length] |
Indicates the cycle length in case the media are tab paper. |
|
[Punch holes] |
Indicates the number of holes in case the media are punched. |
|
[Standard color] |
The color of the media. |
|
[Representation color] |
Indicates a custom color name. |
|
[Shape] |
Indicates if media is an envelope or letterhead media. |