|
Illustration |
Layer |
|---|---|
|
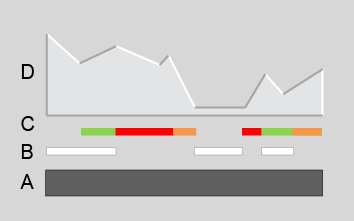
[D]: Elevation (varnish) |
|
[C]: Color |
|
|
[B]: White undercoat (optional) |
|
|
[A]: Media |
The total elevation of your elevated artwork with a Brila effect consist of ([B]: White undercoat) + ([C]: Color) + ([D]: Elevation).
You can define a white undercoat for the areas where you do not want the media to shine through.
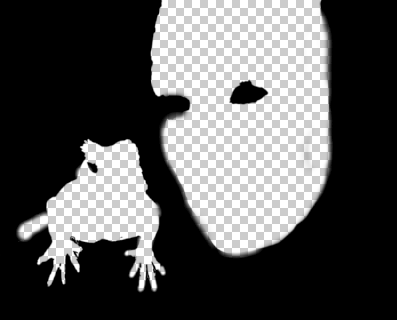
The white undercoat layer should consist of fully transparent areas (i.e. areas without a white undercoat) and fully black areas (i.e. areas with a white undercoat).
The colors in your design are defined in one or more color layers.
For areas where you want white ink to be visible in your artwork, it is advised to use the White undercoat layer [B] for these areas, and make sure the corresponding areas in the Color layer [C] are transparent.
Explanation:
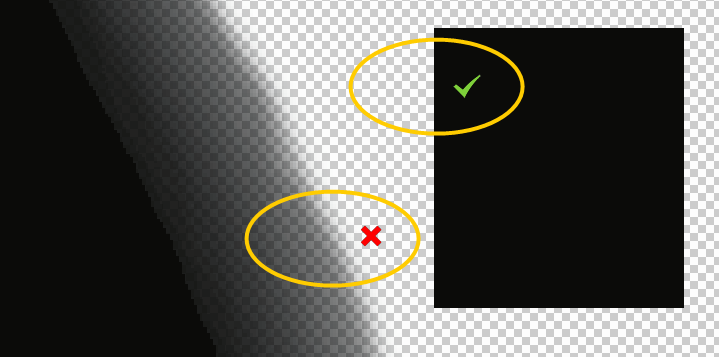
When you define white in the Color layer [C] and the Elevation (varnish) layer [D] contains no elevation, these areas will not be previewed correctly in the Touchstone Preview. Although your design contains no elevation in these areas and the final PDF export will be okay, the Touchstone Preview will wrongly show Elevation (varnish) in these areas.
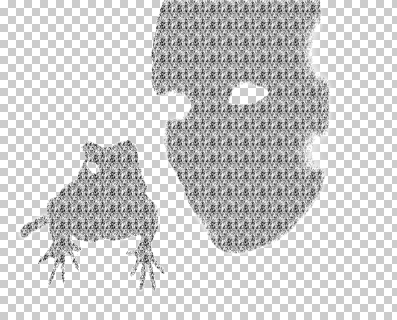
The elevation map consists of one or more grayscale layers that define the elevation of your design. White is not elevated and black is maximum elevated.
The maximum elevation for an elevated artwork with a Brila effect is 0.25 millimeter.
Use matching color and gray profiles (i.e. sRGB and sGray) in order to properly translate the color values to the expected gray levels. That way you can be sure that RGB (128:128:128) corresponds with 50 percent of the maximum elevation.
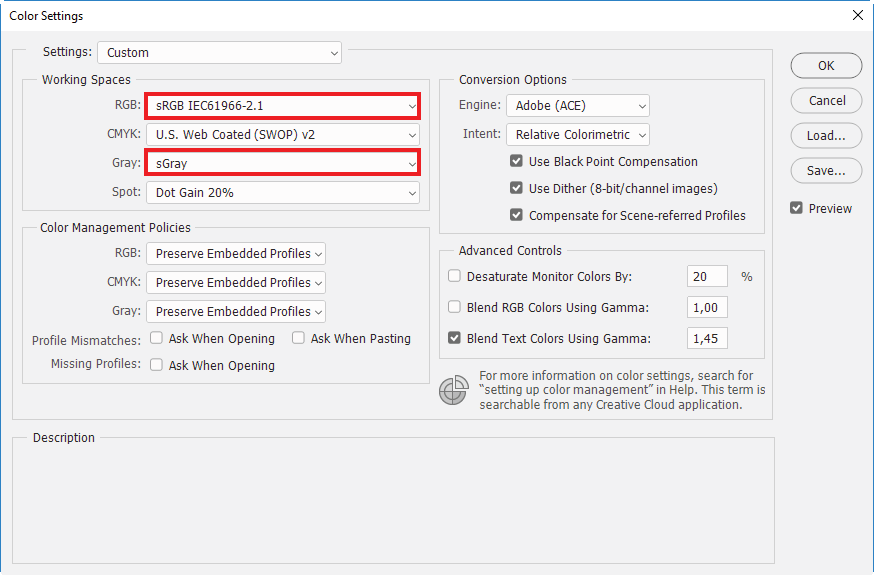
Make sure you define the correct color management settings before you start to work on the elevation map.
When you create your design using multiple computers, make sure you always use the same color management settings (working spaces, color management policies, et cetera) on all computers.
Do not change the color management settings anymore after you have finalized the elevation map. Changing the color management settings affects the gray levels and thus the geometry of the elevation.
To build consistent gray elevation in a color document use the default grayscale swatches ([Window] > [Swatches]) to select the desired gray level.
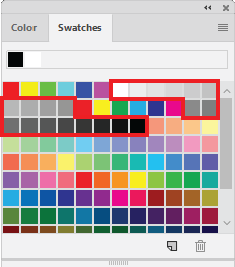
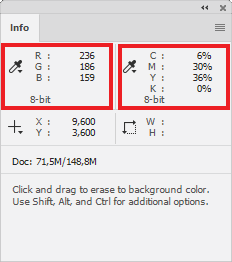
Open the [Info] panel via [Window] > [Info] to double-check the values in the elevation layer.