

The dashboard of the control panel indicates if the staple cartridge needs replacement. The colour of the icon indicates the status of the staple cartridge. (Learn about the printer status)

|
Staple cartridges contains sufficient staples. |

|
At least one staple cartridge is almost empty |

|
At least one staple cartridge is empty. |
You can check the current status of the staple cartridge at te control panel. Location: .
You find the saddle-stitch unit in the stacker/stapler.
 Location of the saddle-stitch unit
For information on the Canon genuine staple cartridges, see Consumables.
Take care when you do maintenance tasks in optionals attached to the machine. When you do a maintenance task, such as replace a staple cartridge, remove waste, or solve jams, other machine parts can continue with job process activities.
Remove the printed output from the booklet tray before you replace the staple cartridge in the saddle-stitch unit.
We recommend to order staple cartridges from your local authorised Canon dealer before your stock runs out.
When a staple cartridge is empty, replace both cartridges.
Only use staple cartridges intended for your print system.
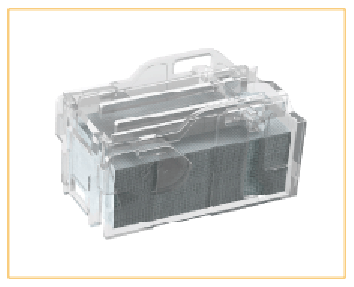 Staple-P1 for
Booklet Finisher-AG
 Remove printed output from the booklet tray.
|
Action |
||
|---|---|---|
|
1 |
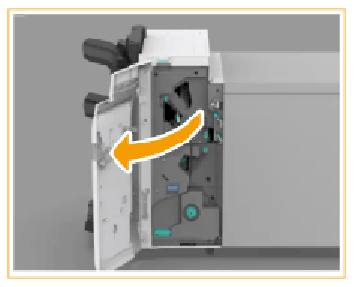
Open the front cover of the stacker/stapler. |
|
|
2 |
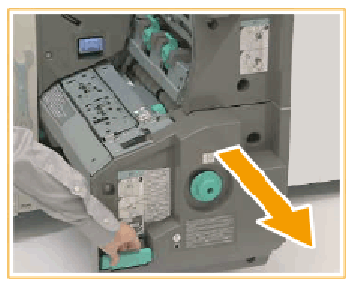
Pull out the saddle-stitch unit with the green handle. |
|
|
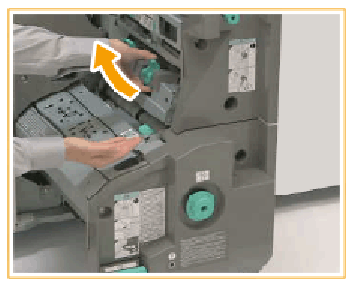
Pull out the staple cartridges. |
|
|
|
3 |
Squeeze the light blue areas to lift the staple case cover. |
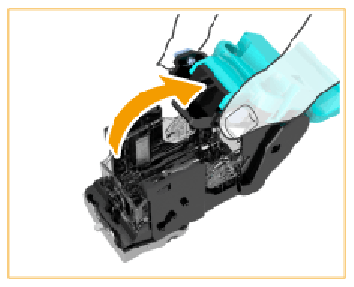
|
|
4 |
Squeeze to release and lift the empty staple cartridge. |
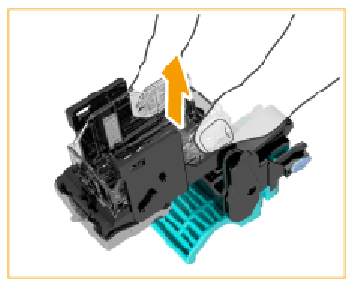
|
|
5 |
Take out a new staple case from the box. |
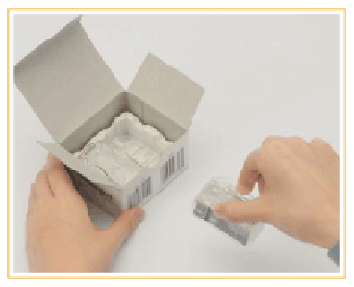
|
|
5 |
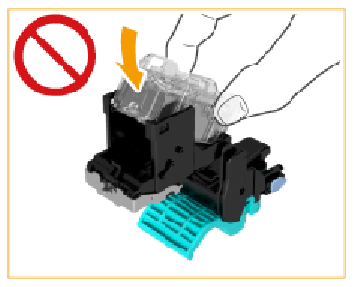
Insert the new staple cartridge until it clicks into place. Make sure you insert the staple cartridge in the correct direction. |
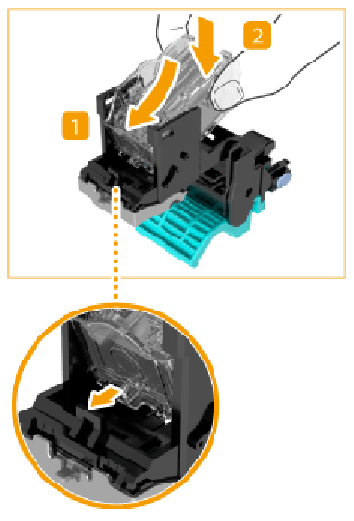
|
|
6 |
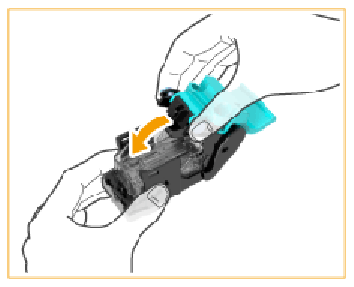
Place the staple case cover in its original position. |
|
|
7 |
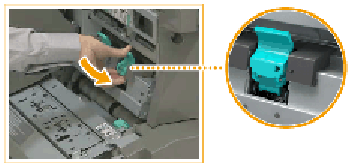
Return the staple case back into the saddle-stitch unit and check that the two arrows are aligned. |
|
|
8 |
Repeat step 2 - 7 for the other staple cartridge. |
|
|
9 |
Gently push the saddle-stitch unit back into the stacker/stapler as far as possible and close the front cover.
|
|