
The 'Printer Registration' dialogue appears.
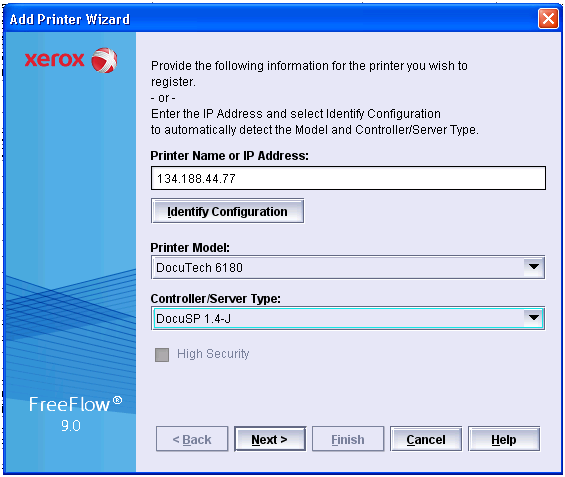
The 'Add Printer Wizard' dialogue opens.
The 4110 printer model use the XPIF ticket, which is recommended. The DocuTech 6180 printer model uses the ASCII XJT ticket.
On FreeFlow 8.0, the use of the XJT ticket is discouraged. Also, the combination of printer models and server types has been reduced. You cannot choose DocuSP 51 anymore for the DocuTech 6180.
|
Step |
Action |
|---|---|
|
1 |
Define the hostname or IP address of the PRISMAsync in the 'Printer Name or IP Address' field. |
|
2 |
Define 'DocuTech 6180' for the 'Printer Model'. |
|
3 |
|
|
4 |
Deselect option 'High Security'. |
|
5 |
Click 'Next'. |

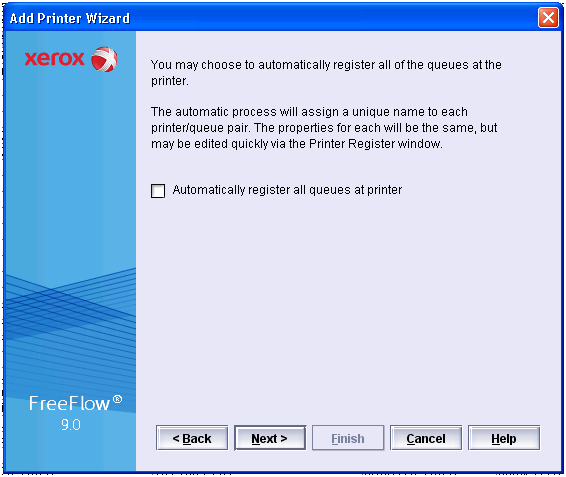
Click 'Next'.

|
Step |
Action |
|---|---|
|
1 |
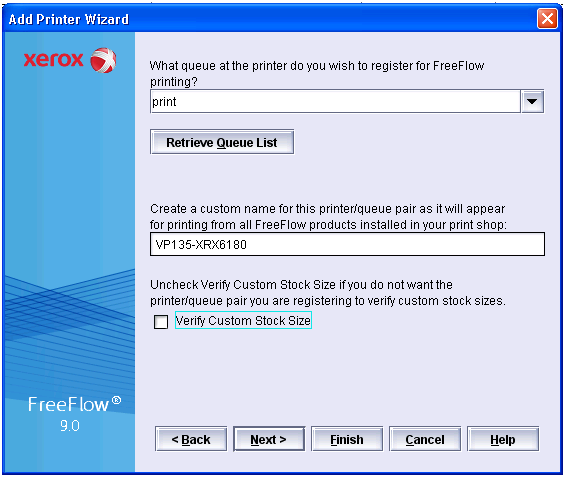
Define the destination of the print jobs in the 'Queue Name' field. You can enter any name. |
|
2 |
Define a printer name in the 'Custom name' field. You can enter any name. |
|
3 |
Deselect option 'Verify Custom Stock Size'. |
|
4 |
Click 'Next'. |

|
Step |
Action |
|---|---|
|
1 |
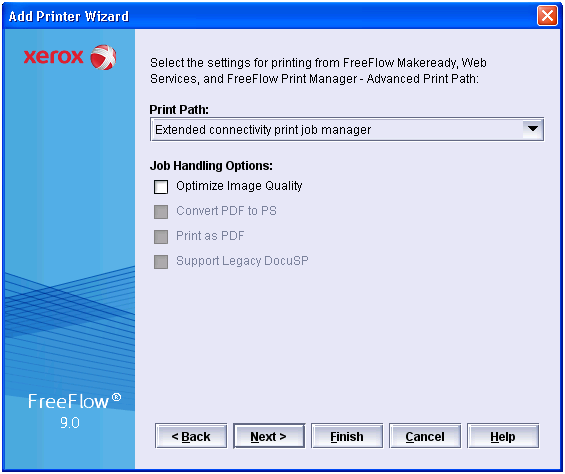
Select value 'Extended connectivity print job manager' for option 'Print Path'. Value 'Extended connectivity print job manager' is mandatory for all Océ VarioPrint printers. |
|
2 |
Deselect option 'Optimize Image Quality'. |
